
 Achieving processing goals, product quality and avoiding unexpected equipment shutdowns are critical for operational excellence and profitability. Ensuring the feedscrew and barrel remain in top condition is an essential part of this equation. In part one of this blog series, we will discuss feedscrew measurement.
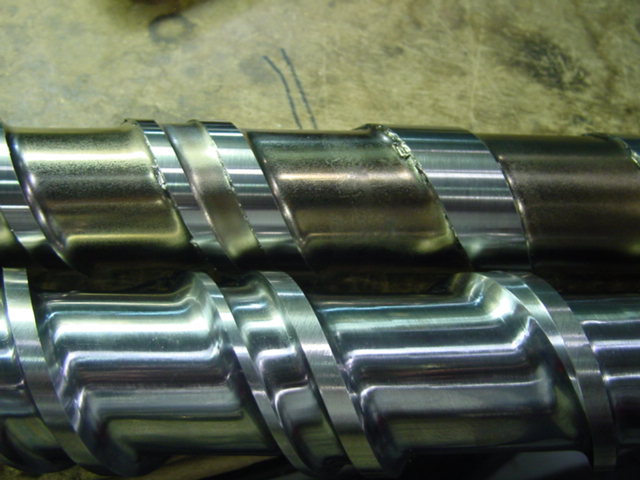
Over time and under continuous operating conditions, the feedscrew and barrel will experience wear. The diameter of the feedscrew will decrease and the diameter of the barrel will increase as the screw wears. It’s important to maintain the clearance between the barrel and screw within tolerable limits to avoid processing issues.
The first step is to do an inspection and measure the feedscrew. You will need both cleaning tools and measuring tools to ensure accuracy of your measurements. All of the plastic solidified residue or build-up must be removed from the screw surface. Be careful not to damage the screw during cleaning. DO NOT USE A STEEL WIRE BRUSH OR AGGRESSIVE ABRASIVE MATERIAL. Use brass tools and copper gauze to avoid damaging the surface.
Required cleaning tools: Brass tools that will not damage the surface; copper gauze; others such as econ blast or dry ice
Required measuring tools: 1) OD bar mic to measure the outer diameter of the screw on the flights; and 2) Tape measure to reference the location along the length of the screw
Process: The following steps will ensure accurate measurement and documentation.
- Remove screw from extruder
- Clean screw using tools listed above
- Allow screw to cool to room temperature before conducting measurements
- Establish reference point on screw
- Number the flights along the screw
- Line up tape measure along length of screw and photograph each section showing the flight number and the tape measure
- Using the OD bar mic, measure the OD of each flight along the screw and record measurements in an excel sheet. See figure 1 below.
- Compare the wear on the screw to the original dimensions. Plot the flight number vs. screw OD on a spreadsheet for a visual comparison of the wear vs. the original dimensions. See figure 2 below.
Figure 1: This is a custom made micrometer for measuring the OD of extruder screws. The OD micrometer has been modified with a bar that can span across the flights of the screw that is being measured.
4-5 inch OD mic on a 4.5 inch screw
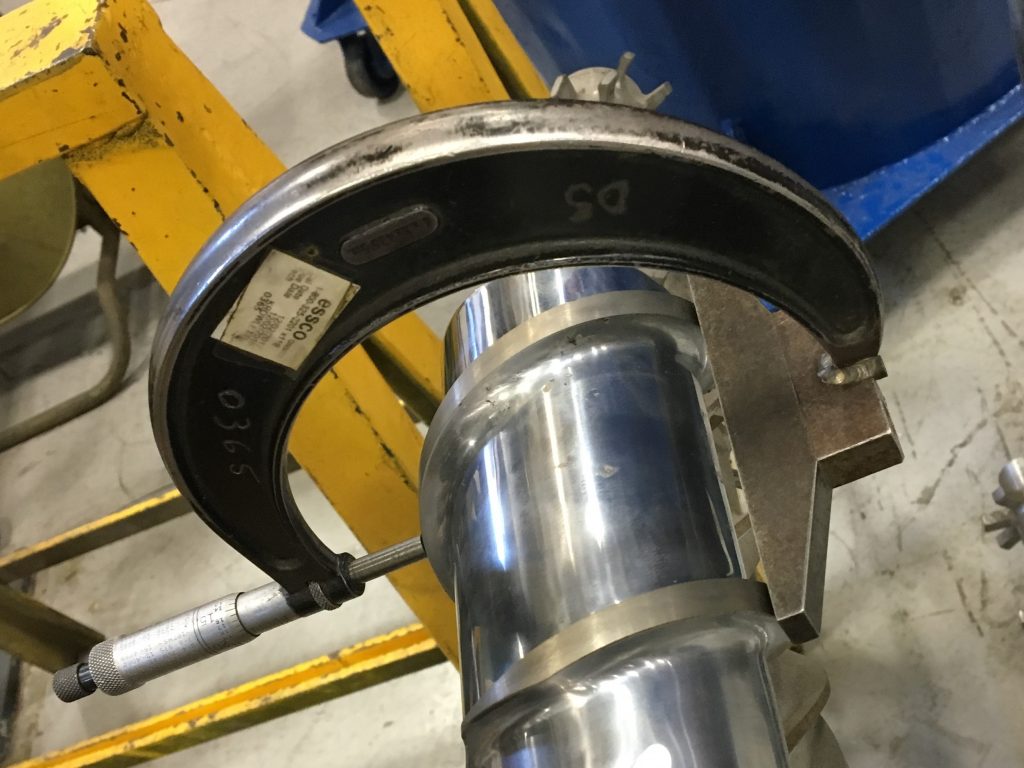
Figure 2:

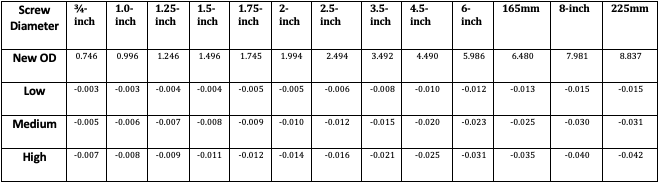
The next step is to determine if the screw needs to be rebuilt or replaced. The chart below shows diametrical wear numbers for various screw diameters. These are guidelines and specific cases can vary. With a low number, you may notice a decrease in output at a given rpm. The medium number reveals the screw should be monitored closely with plans to rebuild or replace the screw in the near future. The high number indicates the screw should be rebuilt or replaced immediately. Note: Special high-work barrier screws limit wear to 75 percent of the barrier flight clearance.
In the next blog, we will talk about barrel measurement. Stay tuned and don’t forget to follow us on social media.
If you have any questions regarding feedscrew maintenance, e-mail marketing at marketing@davis-standard.com.
Cheers,
The D-S Connect Blog Team
What exactly is an OD bar micrometer? Can you give example part numbers for Mitutoyo or Starret?
Good afternoon Mike and sorry for the delay. The OD bar micrometer (mics) is a device that accurately measures the outside diameter of an object. The object that is measured, in this case, a screw flight, is placed in between the spindle and the anvil of the micrometer. By turning the knob, the spindle moves until the object is in contact with both the spindle and the anvil, and the number displayed is the outer diameter dimension.
We do not sell OD bar mics; however, they are custom made by companies that do sell them. Some manufacturers are Starrett and Flight Tech (amongst others).
I hope this information was helpful but if you have additional questions, please feel free to comment below.
If the anvil of a micrometer is placed on the OD of a flight, the spindle will end up on the root of the screw on the other side. I imagine there must be some special device to somehow bridge the gap on the opposite side of the screw. It will probably help to post a picture of how this measurement is taken. Thank you.
Good morning Mike: We think this is a great request and have updated the blog post to include a photo and brief description. Please let us know your feedback or if you have additional questions. We’re happy to help.
good morning ,
we have in the company ,extruder laminator [Tadbik group.c.l.p israel]
i need instructions to remove and clean the screw and barrel .
no of the extruder is
er-we-pa
type c;3,5 ” 30d
com no :2-28822.00
unit no va:7.173.00-0912
year 2011
thank you very mach
best regards
have a safe day
enrico
Good morning Enrico: I will have one of our service team members reach out to you asap. Thank you kindly.